
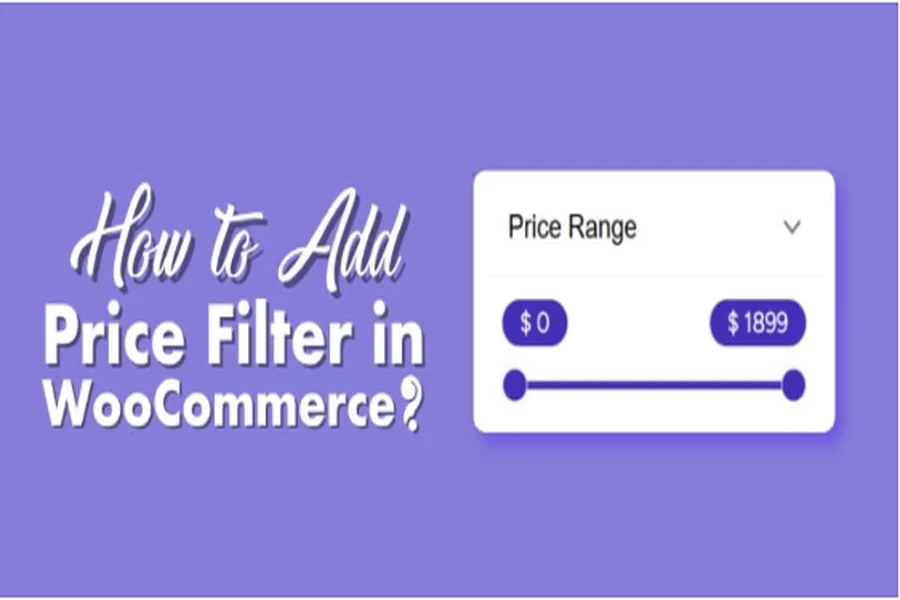
Running an online store means giving your shoppers the best experience possible. One of the easiest ways to do that is by helping them find what they need faster. That’s where a price filter comes in. It lets your customers set their budget and instantly see products that fit. If you’re wondering how to add price filter in WooCommerce, you’re in the right place.
To add a price filter in WooCommerce, install and activate the Dynamic AJAX Product Filters for WooCommerce plugin. Then, set product prices, enable the price control in the filter form, customize the filter style, and use the shortcode [[plugincy_filters]] to display it on your shop page.
Would you like to know more about this topic? If so, then continue reading this article to find every important detail about adding and customizing a price filter in your WooCommerce store easily.
How to Add Price Filter in WooCommerce?
Adding a price filter to your WooCommerce store helps your customers find products within their budget quickly. The best way to do this is by using the Dynamic AJAX Product Filters for WooCommerce plugin. It’s simple to set up and works smoothly. Let’s go through the steps one by one.
Part 1: Install a Price Filter Plugin
You can install either the Free Version or the Pro Version of the plugin. Both versions are easy to use and take just a few minutes to set up.
For the Free Version
Step 1: Open Your WordPress Plugin Section
Log in to your WordPress dashboard and go to Plugins → Add New. This is where you can find, install, and manage all your plugins. It’s like your store’s toolbox where you add new features.
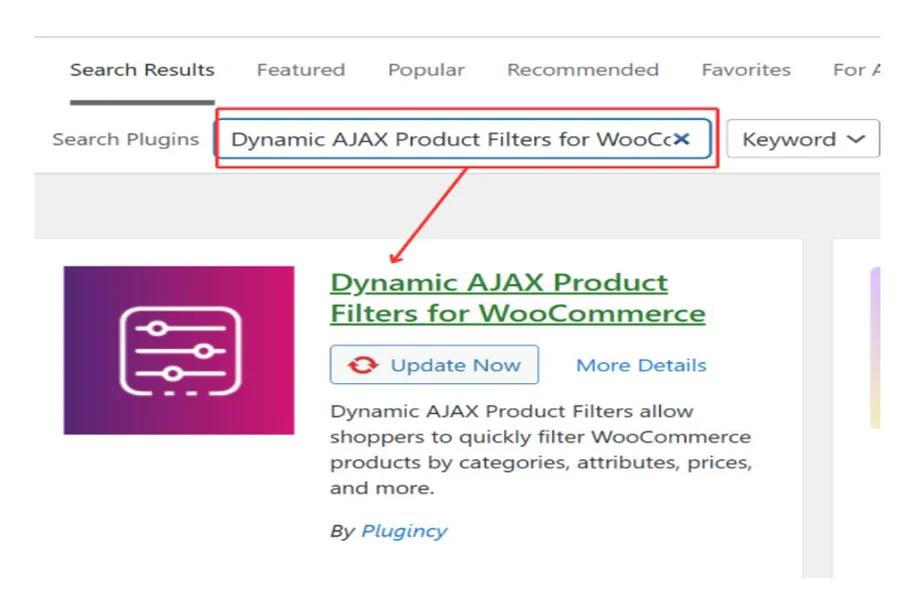
Step 2: Search and Install the Plugin
Type Dynamic AJAX Product Filters in the search bar. When it appears, click Install Now. This will download and add the plugin to your site automatically, just like installing an app on your phone.
Step 3: Activate the Plugin
After installation, click Activate. Once it’s activated, you’ll see a new option called Product Filters on your dashboard. This means the plugin is ready to use.
For the Pro Version
Step 1: Get the Plugin File
If you bought the Pro version from Plugincy, log in to your Plugincy account, download the ZIP file, and save it to your computer. This file contains the advanced version of the plugin.
Step 2: Upload the File to WordPress
Go to your WordPress dashboard → Plugins → Add Plugin→ click Upload Plugin. Then choose the ZIP file you downloaded and click Install Now. This will upload the plugin directly to your site.
Step 3: Activate and Access Settings
After installing Woocommerce Price Filter Plugin, click Activate Plugin. Once activated, you’ll see Product Filters in your dashboard menu. You can now open it and start customizing your filter settings.
Part 2: Set Up the Price Filter
Now that the plugin is active, it’s time to create and display your price filter on your store. Follow these steps to get it working properly.
Step 1: Add Products and Set Prices
Go to Products → All Products in your WordPress dashboard. Edit any product or add a new one. In the Product data section, enter the Regular price and an optional Sale price. Then click Save. This step is important because your filter needs these price details to work correctly. Repeat it for all your products.
Step 2: Show the Price Control in Your Filter Form
Go to Product Filters → Form Manage. Here, you can create a new filter form or edit an existing one. Turn on the Price option to add the price filter to your form. Then click Save Form. This step adds the price slider or input box that your shoppers will use to filter products by cost.
Step 3: Style and Configure the Price Widget
Next, go to Product Filters → Form Style, and select Price from the dropdown list.
Here, you can:
- Pick a filter style like Range Slider or Input Price Range
- Set a minimum and maximum price
- Choose how much the price changes when sliding (increments)
- Show how many products match each range
- Decide if the filter updates automatically or when users click Apply
After adjusting these options, click Save. This step helps make your price filter look neat and work exactly how you want it to.
Step 4: Display the Filter on a Page
Finally, you need to show the filter on your store page so customers can use it.
- Edit the page where you want to show it (like your Shop page).
- Add this shortcode in the content area: [[plugincy_filters]]
This code tells WordPress where to display your price filter form.
Optional: Add a Product List Next to It
If you want the filters and products to show together on the same page, add this shortcode too: [[products]]
Now, when customers move the price slider, the product list will update instantly without reloading the page.
Choose Where It Lives
You can put the filter in different areas:
- Directly in the page content
- In a sidebar widget
- Inside a template area, if you use a page builder like Elementor
This gives you the flexibility to place it where it looks and works best for your store layout.
Issues You Can Face After Adding a Price Filter to Your WooCommerce Store
Adding a price filter can make your store easy to use and clean. But sometimes, small setup mistakes can cause big problems on your site. You might see slow pages or filters not working as expected. Below, we’ll discuss some typical problems and solutions.
Filter Not Showing on Shop Page
Sometimes the price filter does not appear on your shop page. This usually happens when the shortcode is missing or placed incorrectly. Check that you added [[plugincy_filters]] in your page editor. Make sure the plugin is active and linked correctly to your filter form.
Filter Not Updating Products
The filter may not update product results when users change prices. This happens if AJAX is not working properly. Go to the plugin settings and check if “AJAX filtering” is enabled. Also, ensure your theme supports live filtering without reloading the page.
Products Not Displaying Correctly
At times, filtered products do not show or show wrong prices. This could be because product prices are missing or entered incorrectly. Double-check the price field for each product. Set both regular and sale prices to help the filter work accurately.
Slow Loading After Adding Filter
You might notice your store loading more slowly after adding the filter. This happens when the plugin uses heavy scripts. Try clearing your site cache or using a caching plugin. Disabling extra widgets you don’t need can also speed up your store.
Filter Range Not Matching Product Prices
If the filter range doesn’t match your product prices, it confuses shoppers. This happens when the min and max values are not set properly. Go to Form Style and update the range based on your highest and lowest product prices. Save the settings after changes.
Conflict With Other Plugins
Some plugins can conflict with your price filter plugin. You may see the filter not working or the layout breaking. Try deactivating other plugins one by one. This will help you find the one causing the issue. Update all plugins to the latest version as well.
Filter Not Working on Mobile
Sometimes, the price filter looks fine on desktop but breaks on mobile. This is often caused by theme compatibility or CSS issues. Use a responsive theme and check your filter layout in mobile view. You can adjust padding and size in the plugin’s style settings.
Can You Customize the Look of the Price Filter?
Yes, you can customize the look of the price filter in your WooCommerce store to match your website’s style and layout. The plugin gives easy options to change colors, fonts, and the overall design of the filter. You can adjust these settings without coding, making it simple for anyone to personalize their store.
The plugin also allows you to choose between different filter styles like sliders, buttons, or input boxes for a better user experience. You can set minimum and maximum prices, change the slider shape, and even decide how it updates. These small design choices help make your filter look neat, clear, and easy for customers to use.
If your theme supports widgets or builders, you can also place the filter anywhere that fits your store layout best. You can add it in sidebars, product pages, or custom areas depending on your store’s design. This flexibility makes it simple to create a filter that looks good and works perfectly on every device.
Why Should Store Owners Add a Price Filter in Their WooCommerce Store?
Online shopping becomes much easier when customers can narrow products by price. A simple price filter helps them find what they want quickly without scrolling endlessly. It’s a small feature, but it can make a big difference in how smooth and enjoyable the buying process feels. Let’s look at why adding a price filter in WooCommerce is a smart move for any store owner.
Improves User Experience
A price filter makes shopping simple and stress-free. Customers can set their budget and see only products that fit their range. This saves them from scrolling through pages they don’t need. It creates a smoother and more enjoyable shopping experience that keeps people coming back to your store.
Increases Conversions
When shoppers can easily find products that match their budget, they’re more likely to buy. Without a price filter, customers may leave if they can’t find something affordable. Making the buying process easy helps build trust and turns more visitors into paying customers in your WooCommerce store.
Helps Customers Discover Products
Many shoppers skip great products just because they’re hard to find. A price filter helps them discover items they might not see otherwise. It sorts your products by price, making it easier for shoppers to find what fits their needs and budget without missing hidden gems on your WooCommerce site.
Boosts Average Order Value
Price filters motivate customers to explore additional options. When shoppers find products within their preferred range, they’re more likely to discover items they didn’t plan to buy. This can lead to bigger carts and higher average order values as they continue browsing within budget.
Enhances Store Organization
Adding a price filter gives your WooCommerce store a clean, structured layout. Products are neatly categorized, making navigation simple and enjoyable. This sense of order builds trust and helps customers shop confidently, increasing the likelihood of completing a purchase.
Builds a Positive Brand Image
When your store is easy to use, customers remember it. A simple price filter shows that you care about their shopping comfort. It gives your website a professional and friendly feel. The better your store looks and works, the more likely shoppers are to visit again.
Ways to Improve the Usability of Your Price Filter
A price filter helps customers shop faster by narrowing choices to what fits their budget. But for it to work well, it must be simple, clear, and easy to use. Let’s look at some smart ways to make your WooCommerce price filter more user-friendly and effective.
- Use a Clean Slider Design: A simple slider helps users move the price range smoothly. It keeps the page tidy and lets people see their price limits clearly.
- Add Clear Labels: Label both ends of your slider with minimum and maximum prices. Clear labels make it easy for shoppers to know their spending range.
- Show Instant Results: When users change the price range, products should update right away. This quick feedback keeps them interested and improves shopping speed.
- Include an Apply Button Option: Some shoppers prefer control before results refresh. Adding an “Apply” button gives them time to choose their exact price range.
- Keep It Mobile Friendly: A price filter should fit well on phone screens. Make sliders and buttons large enough so users can tap easily.
- Use Logical Price Steps: Set price steps that match your products’ actual value range. Too large or too small gaps can confuse buyers easily.
- Show Product Counts: Display how many products fit within the chosen range. This gives users confidence and helps them refine their search better.
- Place It in the Right Spot: Put your filter where users expect to find it, like a sidebar. Easy access means faster searches and happier customers.
Conclusion
Adding a price filter in your WooCommerce store is one of the simplest ways to make shopping easier for your customers. It helps them find products within their budget quickly and keeps your store organized. When used correctly, it also improves user experience and boosts sales naturally.
If you ever wondered how to add price filter in WooCommerce?, the process is simple and quick. All you need to do is install the right plugin, set up the price range, and place the filter where it fits best. This small change can make your store more interactive and customer-friendly.
A good price filter not only saves time but also builds customer trust. It shows your store cares about user comfort and smooth navigation. By setting it up properly, you make your WooCommerce store smarter, cleaner, and more enjoyable to shop from.

