
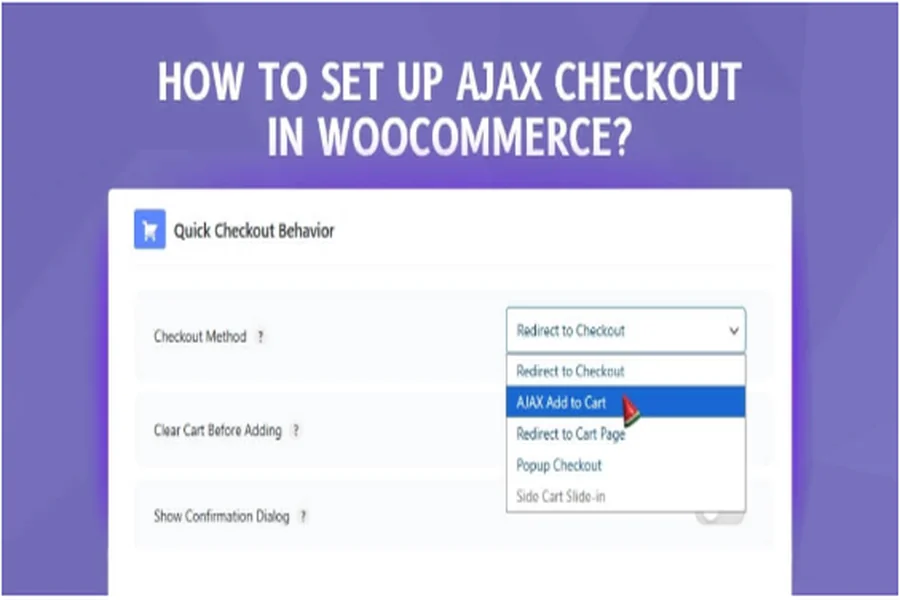
WooCommerce’s Ajax Checkout is an excellent way to speed up and simplify the checkout process. It helps customers finish their orders on one page without page reloads. If you’re running an online store, you might already be thinking about how to set up Ajax Checkout in WooCommerce.
To set up Ajax checkout, install the One Page Quick Checkout for WooCommerce plugin. Activate it from your WordPress dashboard, then enable the one-page checkout option in settings. You can apply it to single or all products, adjust layouts, and even use page builders like Elementor or Divi for easy customization.
Do you want to make your checkout faster and simpler for your customers? Then continue reading, because this article explains every step you need to know. You’ll find clear setup instructions, useful tips, and extra settings to make your store run smoothly.
How to Set up Ajax Checkout in WooCommerce?
Setting up an Ajax checkout makes your store faster and easier to use. It lets buyers add products, fill out details, and pay on one page. This keeps everything simple and helps reduce drop-offs. Read below to learn the full steps to set it up in WooCommerce.
Step 1: Install the Plugin
To use Ajax checkout, you need the One Page Quick Checkout for WooCommerce plugin. It helps create a single checkout page so customers can finish shopping fast. You can use the free or pro version. Follow the procedures below to install it.
Install The Free Version
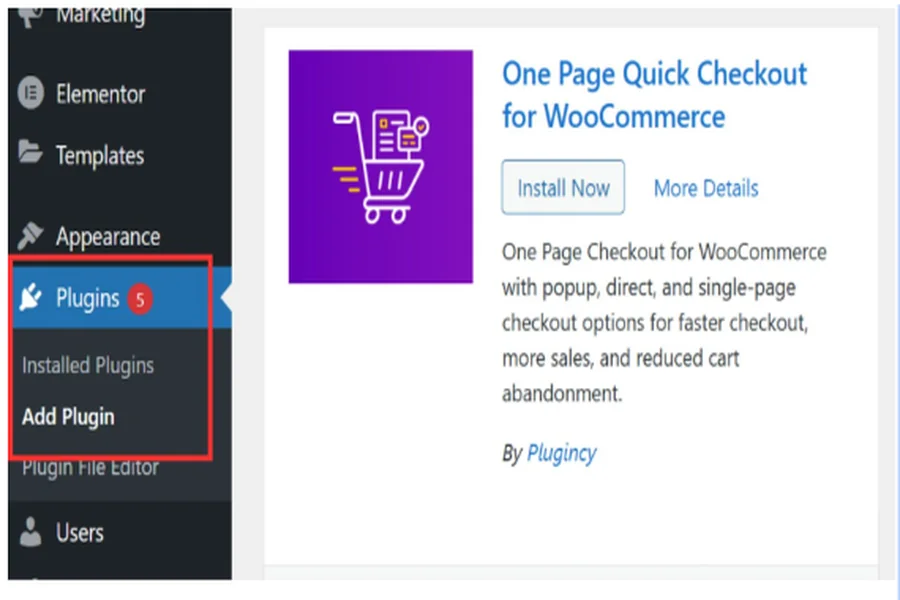
Go to your WordPress dashboard and click Plugins. Choose Add Plugin and search for One Page Quick Checkout for WooCommerce. When you see it, click Install Now, then Activate. That’s it. You now have the free version ready to set up for your store.
Install the PRO Version
The pro version gives you extra features and more control.
1. Purchase the PRO Version: Visit the official website and purchase the PRO version. Once your purchase is complete, you will receive an email with a link to download. Click the link and download the ZIP file.
2. Install the Plugin:
- Navigate to Plugins → Add New. Then click on Upload Plugin.
- Select the downloaded ZIP file and click Install Now.
3. Activate the Plugin: Once installed, click on Activate.
4. Go to Onpage Checkout → Plugin License and enter your license key to unlock all PRO features.
You are now ready to unleash the full potential of the One Page Checkout plugin.
Step 2. Enable One Page Checkout
After installation, the plugin will enable one-page checkout (Ajax checkout) by default. If not, you can turn it on manually. Go to Onpage Checkout in your dashboard, click One Page Checkout, and toggle Enable One Page Checkout to on. Once done, you can apply it to single or all products.
Apply to a Single Product
If you want this checkout only for one product, go to Products in your dashboard. Choose the product and scroll to One Page Checkout settings. Turn on the one-page checkout option. This makes the buying process quicker for that specific item and gives your users a better experience.
Apply to All Products
You can also apply it to every product on your site. Go to Onpage Checkout, then click One Page Checkout. Turn on Enable for All Products. This will make one-page checkout active across your store. It saves time and helps every customer finish shopping easily.
Adjust Extra Settings
The plugin has a few extra settings to make checkout match your store style. You can change the form position, clear the cart on load, or auto-add items to the cart. You can also hide the Add to Cart button and pick your layout. Go to Onpage Checkout → One Page Checkout to make these changes.
Use Multi Product One Page Checkout
With this feature, shoppers can buy many items on one page. It shows all products together and lets users check out quickly. You can display products by category, tags, or product ID. It helps create a faster shopping flow and gives customers a simple buying experience.
Add With WordPress Blocks
You can add the checkout using WordPress Blocks instead of shortcodes. Open your block editor and search for Multi Product One Page Checkout. Choose your product settings, pick a layout, and adjust colors or spacing. You can also add custom CSS for a personalized design.
Add With Elementor
If you use Elementor, setting up is very easy. Open your page in Elementor and search for Multi Product One Page Checkout. Pick your product group, choose a layout, and customize it. You can adjust style and spacing to match your site’s look. This gives a full drag-and-drop setup option.
Use With Other Page Builders
This plugin also works with Divi and WPBakery. Just copy the shortcode and paste it into a text or code block. The plugin will create the checkout section on that page. This keeps the setup simple and works well with almost any builder.
Using one-page checkout can increase your store’s sales and make shopping faster. It saves your customers time and keeps them happy. You can use the free version or upgrade for more tools. Follow the steps above to set up Ajax Checkout and make your WooCommerce store better today.
Typical Issues After Setting Up Ajax Checkout and How to Resolve Them
After setting up Ajax checkout, some small issues may show up. These are usually easy to fix and take only a few minutes. Most of them happen due to plugin conflicts or wrong settings. Read the list below to see quick fixes for the most common problems.
Checkout Page Not Loading Properly
Sometimes the checkout page may not load fully. This often happens when caching plugins are active. Try clearing your cache or disabling the caching plugin. Also, refresh your site and check again. If it still fails, make sure your One Page Quick Checkout for WooCommerce plugin is updated.
Cart Items Not Updating
In some cases, cart items may not refresh after adding or removing products. This usually means the Ajax function is not running properly. Turn off other plugins one by one to find the cause. Once you find the conflicting plugin, keep it off or report the issue to support.
Slow Loading Time
A slow checkout page can reduce sales. Try disabling unused plugins and clear your cache. Check if your images are too large or if your theme is outdated. Keeping your WooCommerce and One Page Checkout plugins updated often helps improve speed and performance.
Compatibility Problems With Page Builders
If your checkout doesn’t show in Divi, Elementor, or WPBakery, check plugin updates first. Older versions may not fully support page builders. Try pasting the shortcode inside a new text or code block. Also, make sure you are not using both the block and shortcode at once.
Plugin License Not Activating (PRO Version)
When your PRO version license fails to activate, check the key first. Go to Onpage Checkout → Plugin License and confirm it’s entered correctly. If it still fails, deactivate and reactivate the plugin. You can also contact the plugin’s support team for a replacement key.
Checkout Buttons Not Responding
If your checkout buttons freeze or don’t respond, it’s often a JavaScript conflict. Turn off other scripts or plugins that may interfere. Try switching to a default WordPress theme to test. Once the issue is found, reactivate your main theme and fix the script conflict.
Why Use the One Page Quick Checkout Plugin for Your WooCommerce Store?
A fast and simple checkout makes shopping more fun and easy. Customers love it when they can buy items without clicking through many pages. The One Page Quick Checkout for WooCommerce plugin helps make this possible. Let’s look at why this plugin is great for your online store.
Quick and Easy Popup Checkout
This feature lets your customers complete their order from a pop-up box. They don’t have to open a new page or reload the site. Everything appears in a small window for faster checkout. This saves time and makes the buying process smoother for every shopper.
Direct Checkout From Any Page
With this plugin, shoppers can buy straight from the shop or category pages. They can even check out right from product listings. This removes extra steps and helps increase sales. Fewer clicks mean more completed orders and happier customers for your store.
One Page Checkout Flow
Everything a shopper needs is on one page — cart, billing, and payment. This setup saves time and reduces drop-offs during checkout. Customers can fill in details, review their order, and pay without switching screens. It keeps the shopping process quick and simple.
Quick View for Products
Customers can preview products instantly using the quick view option. They can see important product info without leaving the current page. It helps them decide faster and stay focused on buying. This feature keeps your visitors engaged and saves time during shopping.
Visual Checkout Form Editor
You can design your checkout form the way you like. The visual editor lets you move fields, change text, or hide sections. It’s simple and doesn’t need coding skills. This gives you full control over how your checkout form looks and works.
Trusted Badges on Checkout
Adding trusted badges makes your store look safe and reliable. Customers feel more confident when they see secure payment signs or brand logos. The plugin allows you to display badges right on the checkout page. This small step can help increase trust and boost sales.
Smooth Ajax-powered Checkout
The plugin uses Ajax to make the checkout run smoothly. Pages don’t reload after every click, which keeps the process fast. Customers can update their cart or payment info without waiting. It gives them a better experience and reduces checkout delays.
Ways to Check the Performance of an Ajax Checkout
Testing your Ajax checkout is just as important as setting it up. It helps you find small issues before they affect customers. A smooth checkout keeps buyers happy and reduces cart drop-offs. Follow these simple ways below to make sure everything works perfectly.
Use Website Speed Checkers
Speed is one of the most important parts of checkout. Use tools like Google PageSpeed Insights, GTmetrix, or Pingdom to test it. They show where your checkout slows down and how to fix it. Enter your checkout link to get a score and helpful improvement tips.
Test on Real Devices
Never assume it looks fine on every screen. Use real phones, tablets, and computers to test the checkout page. Make sure buttons are easy to tap and forms are readable. Check how it loads on both Android and iPhone. This helps you confirm a smooth experience for everyone.
Check User Interaction
Watch how users move through the checkout. Make sure each step is clear and easy to follow. Test guest checkout, coupon fields, and payment options. Try entering wrong data to see if error messages appear. All of this helps you make the checkout process simple and reliable.
Try Different Layouts
Changing small design parts can make a big difference. Use A/B testing to try different button colors, text, or form styles. Compare one layout with another and track which performs better. These small changes can improve your Ajax checkout and increase completed orders.
Use Test Mode
Many checkout plugins come with a test mode option. Use it to check the full process without real payments. This lets you see if all fields and payment gateways work properly. Keep the setup simple and show trust symbols clearly to build customer confidence.
Keep Monitoring After Launch
Even after your checkout goes live, keep testing it. Check your speed, layout, and payment steps often. If customers report issues, fix them quickly. Regular testing ensures your WooCommerce Ajax checkout stays fast, secure, and user-friendly at all times.
Tips to Make Your AJAX Checkout Run Smoothly
A fast Ajax checkout gives shoppers a better buying experience and fewer abandoned carts. AJAX checkout helps pages load quickly and saves time. Follow these simple tips to keep everything running smoothly for your customers.
- Keep Plugins Updated: Update WooCommerce and related plugins often to prevent conflicts and bugs. Old versions can slow your AJAX checkout and cause loading errors.
- Use Lightweight Themes: Choose a simple theme that loads fast and works well with WooCommerce. Heavy designs or animations can delay your checkout response time.
- Enable Caching Wisely: Use a trusted caching plugin, but exclude checkout pages from being cached. This keeps order details accurate while improving site speed.
- Compress Images: Large images can slow your checkout page performance. Compress them before uploading to ensure your AJAX checkout runs faster and smoother.
- Test on Different Devices: Always check your checkout page on various screens and browsers. This ensures the layout and buttons work well everywhere for users.
- Limit Unneeded Scripts: Too many scripts running together can slow AJAX requests. Remove unused ones to keep your checkout lightweight and responsive during purchase.
- Monitor Page Speed Regularly: Tools like GTmetrix or PageSpeed Insights help track performance. Regular tests show slow areas, so you can fix them quickly.
- Keep the Checkout Form Simple: Ask only for essential information to save user time. A short and clean form makes your AJAX checkout more user-friendly.
Conclusion
A smooth checkout is one of the best ways to keep shoppers happy. When customers can buy products in just one step, they’re more likely to complete their orders. That’s what makes setting up Ajax checkout such a smart move for any WooCommerce store.
If you’ve been wondering how to make your store faster and easier, learning how to set up Ajax Checkout in WooCommerce is the perfect start. It helps you simplify every step and turn a slow process into a quick and simple one.
Once your checkout runs smoothly, your customers will enjoy shopping more and come back often. Keep testing, improving, and updating your settings regularly. A little fine-tuning can turn your online store into a place people love to buy from.

